How I build the unicorn
Months ago ,I was reading a post of Hadoque on playmoboard when he was talking about his fleet.
I got inspired to build a unicorn trimaster ,I did not have the time that moment ,but during the holidays I had the chance to buy me two 3940 ships for a nice price . Since then I got the chance to meet Hadoque in person and we discussed the project, Some great ideas came out of that discussion.
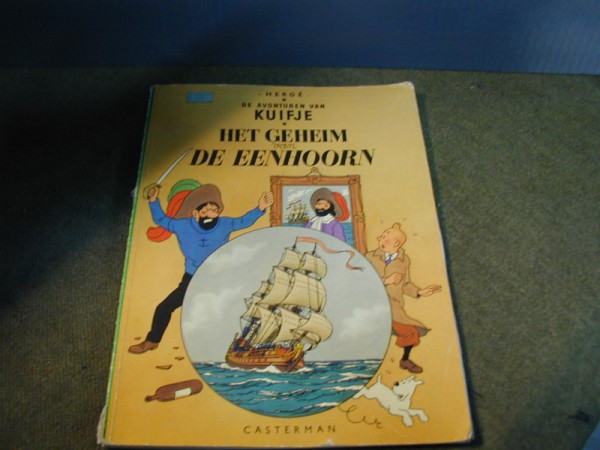
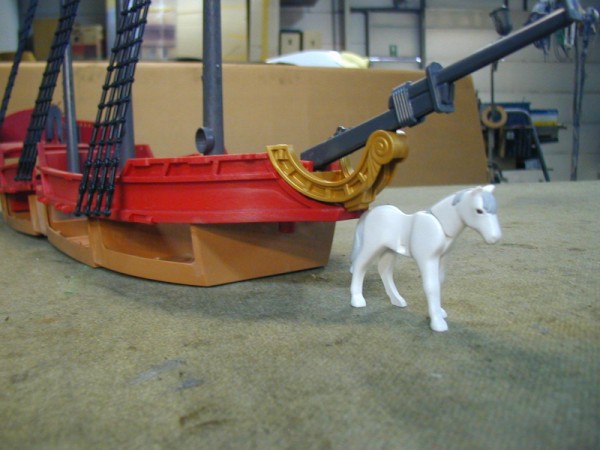
This is the picture I used as a model
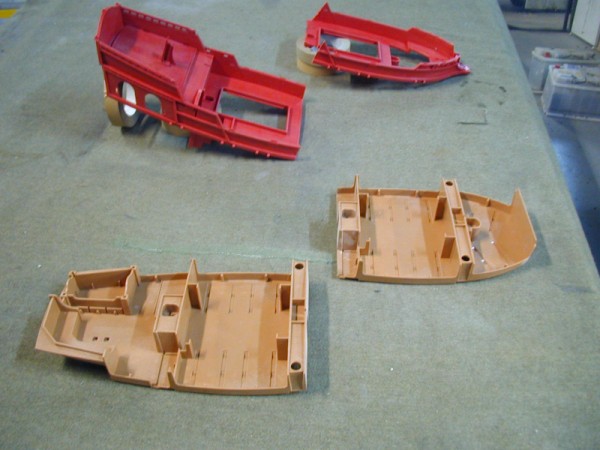
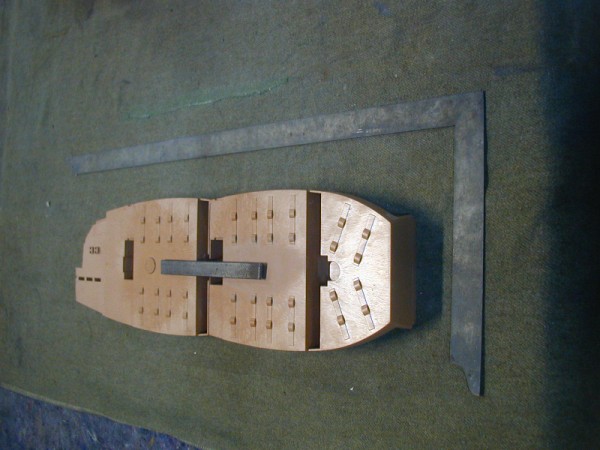
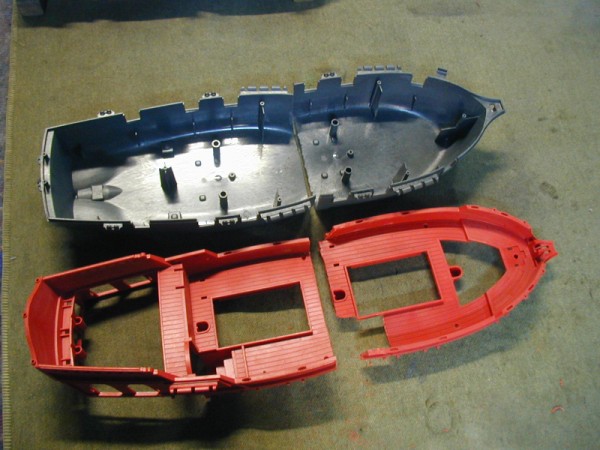
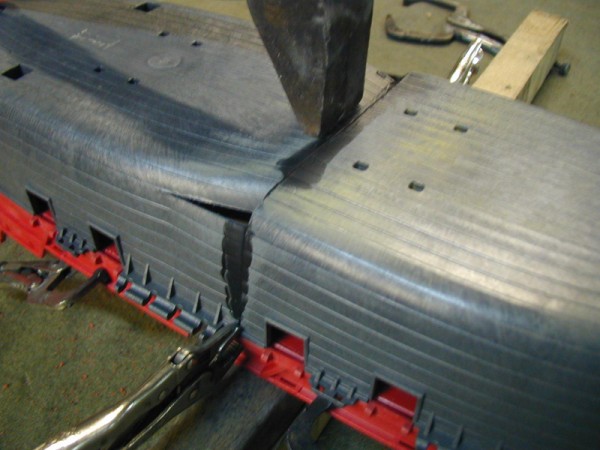
For weeks I put the two ships on my desk next to each other to decide where to cut them ,because I wanted to save the back who would be left over ( to use on another ship ) It wasn't so easy , In following picture you can see where I cut the ships
Sorry for the fuzzy pictures sometimes
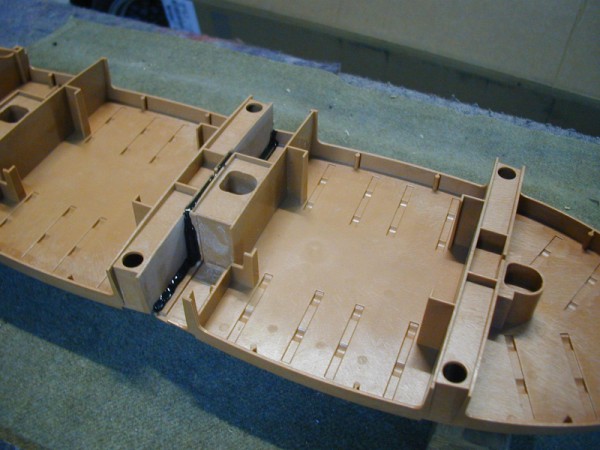
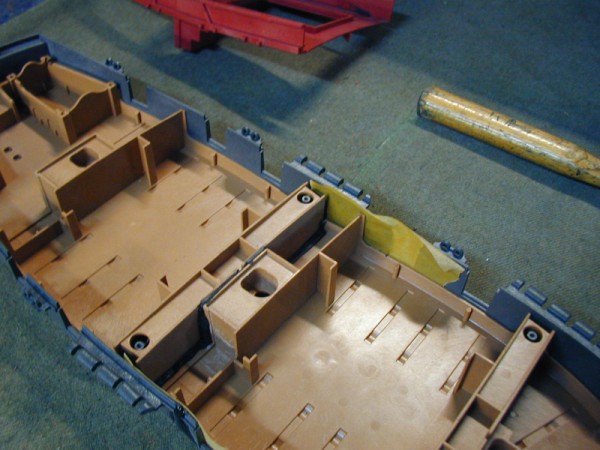
I used the brown interior as base for alignment
Then I glued front and back together to obtain the base where I could build the ship around t
Here you can see the saw I used to cut the parts
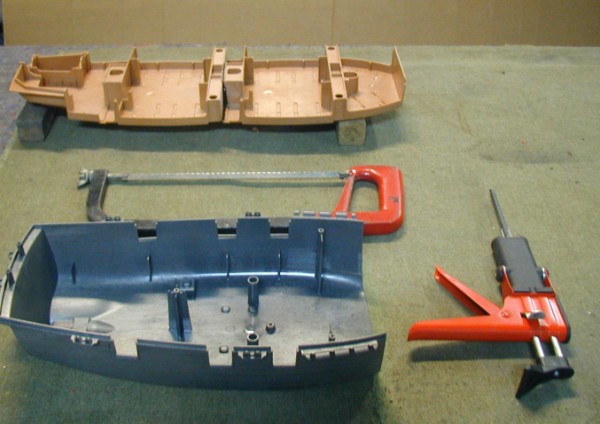
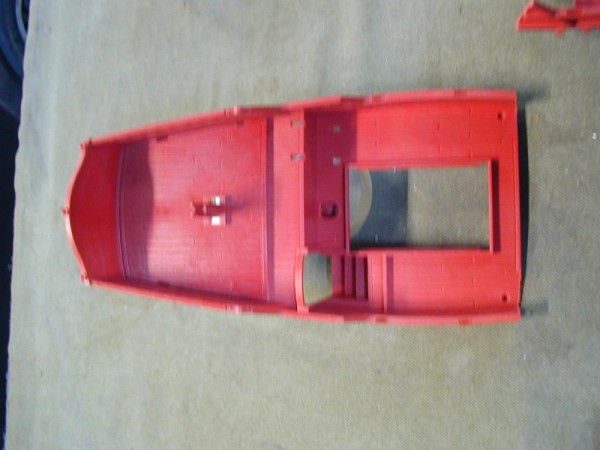
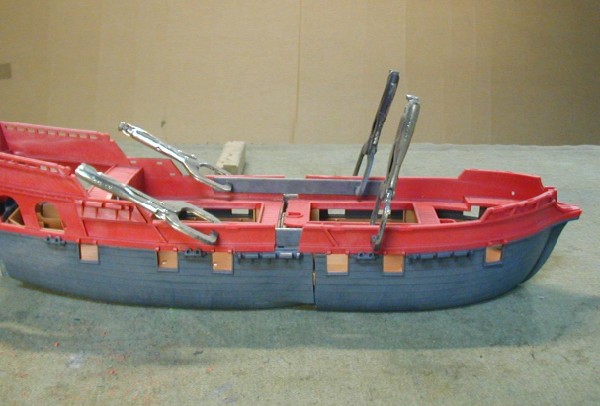
Then I had to decide where to cut the lowerparts of the ship so I put one on another like the following picture
This was to look how the horse would look on the front of the ship
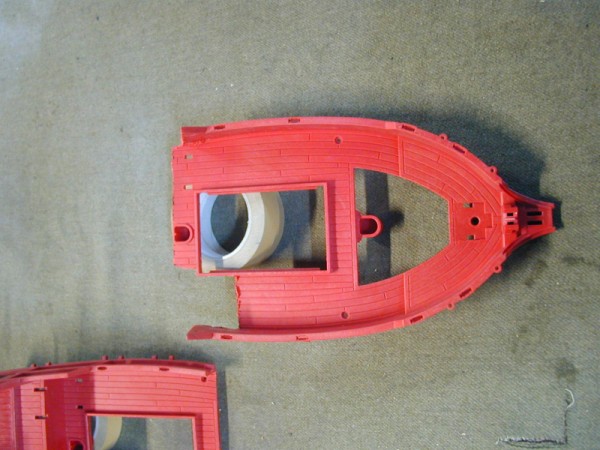
Top and lowerparts together before I glued them I hope it is clear where I cut the parts
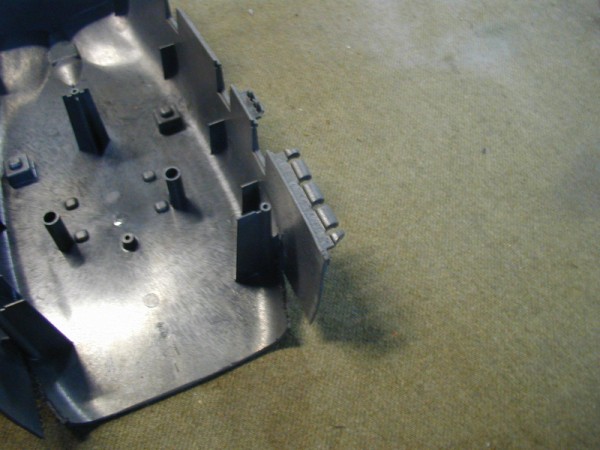
The lowerback part had to be deformed a little bit like below
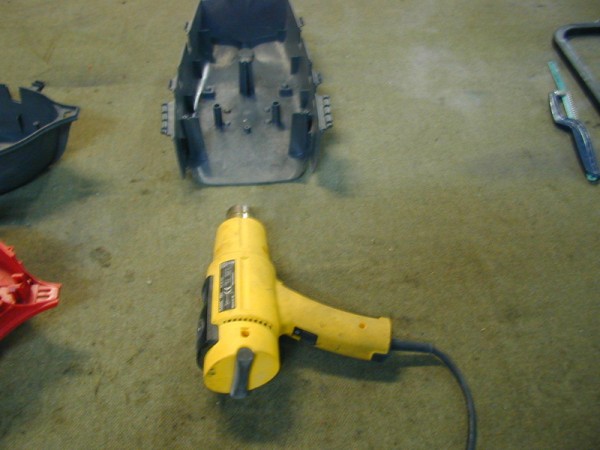
I used the yellow tool below , It's a tool who blows hot air , something you use to take paint from old furniture for example
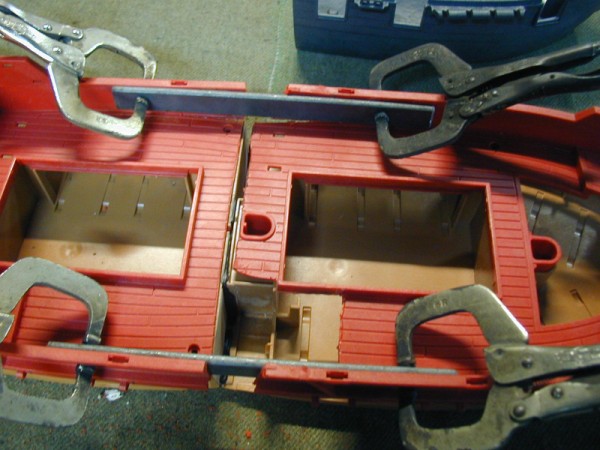
Then I put all the parts together, I used metal barrs to align the upperparts because they aren't straight
This is a closer picture ,You can see the metal bars keeps the sides in a straight line
You can see I waited long before I started glueing,
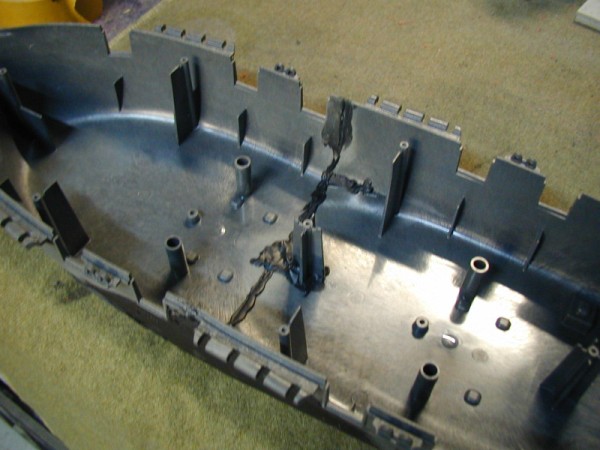
The glueing I did in several fases , here you can see the bottom , Because of the tension and the deformation of the plasic I used a very heavy hammer to align the bottomside (fuzzy again)
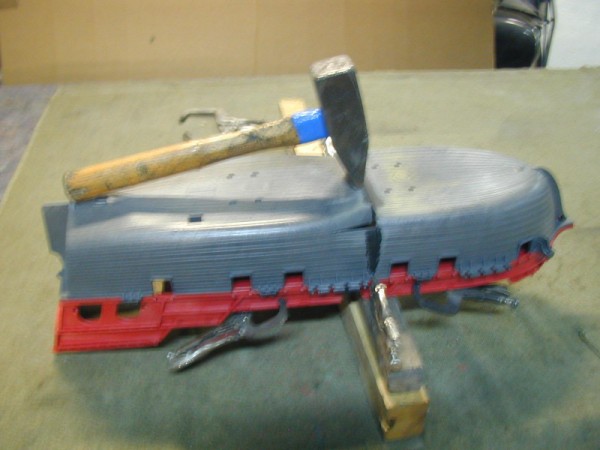
A closer picture
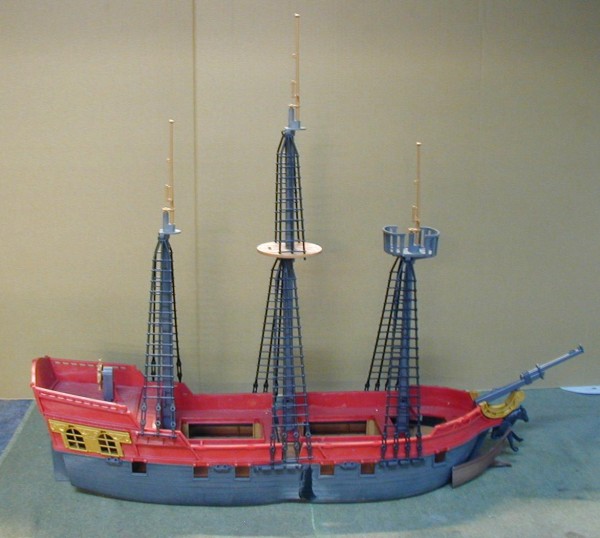
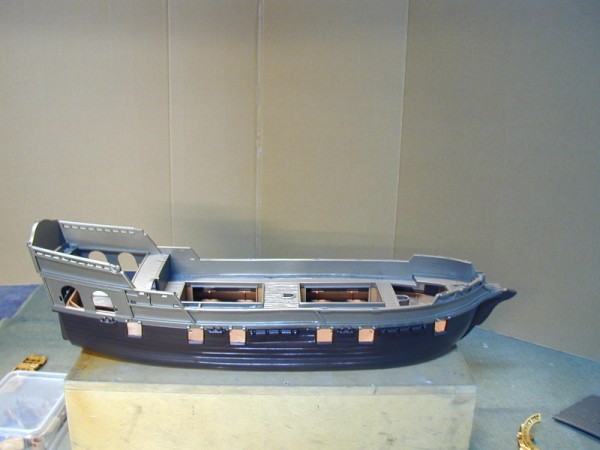
Now we got ourselves a body from a three - master

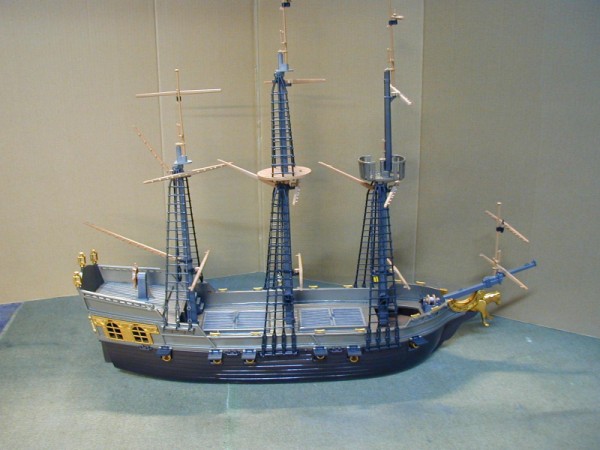
Next obstacle to take , The masts , I had no Idea at first ,so I put the ship together and let it rest for a few days . With the comicbook beside , keeping in mind Haddock's words to enlarge the masts and this is what it became

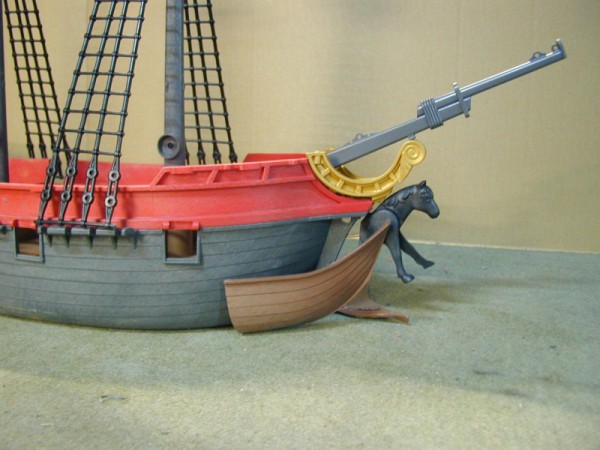
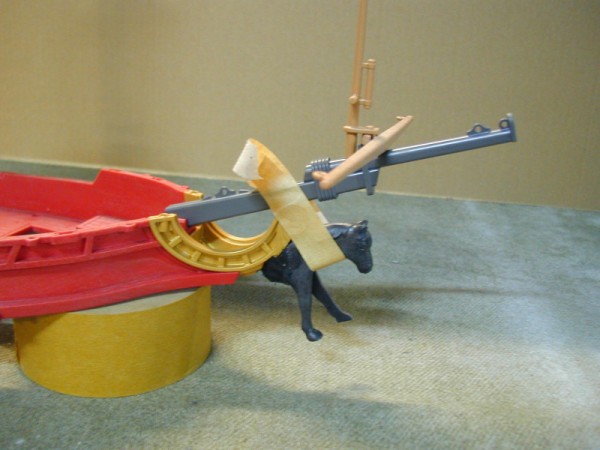
Then I had to decide what to do with the horse at the front , one horse had to die ( I needed to cut the back of) so it would fit on the front of the ship
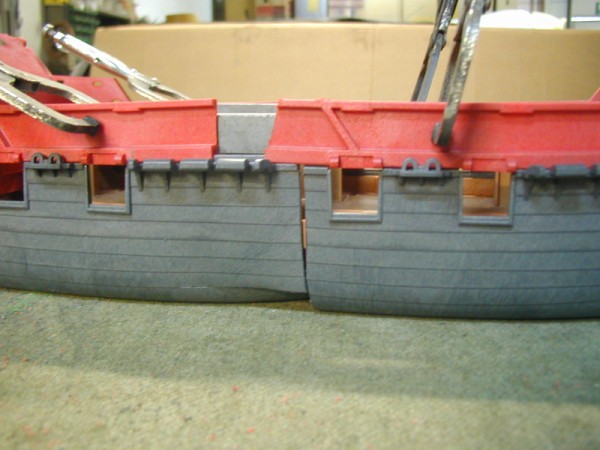
Because of the tension on the plastic on the side I first glued a little part like on the following picture

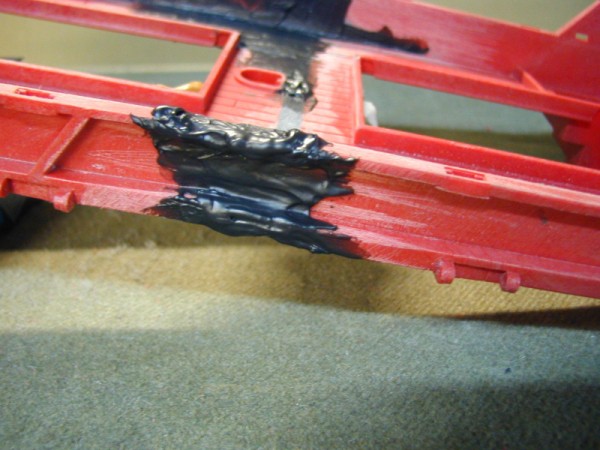
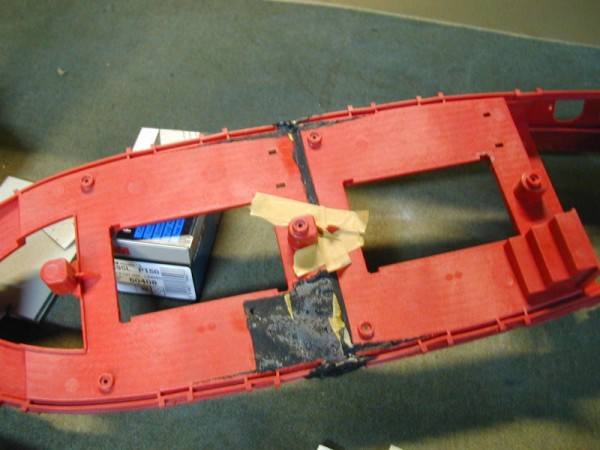
To close the wholes in the side I put masking tape like on the next picture and filled it with two component glue ,the tape also serves to avoid that the lowerparts and the inside got sticked together
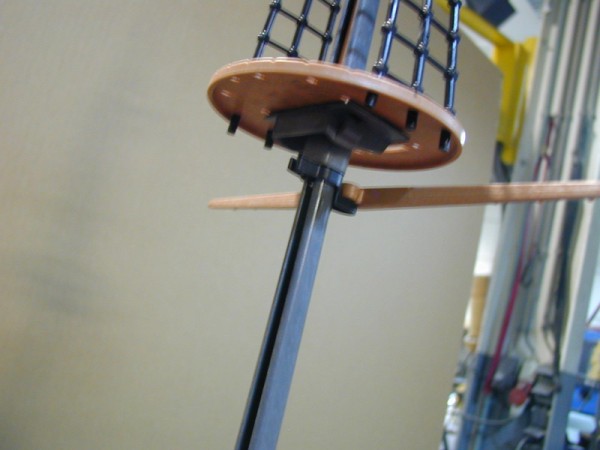
Here you can see how the platform is atached to the mast
The maskingtape on the next picture is to hold the cutted horse on his place while glueing it
How I glued the inside of the lowerparts
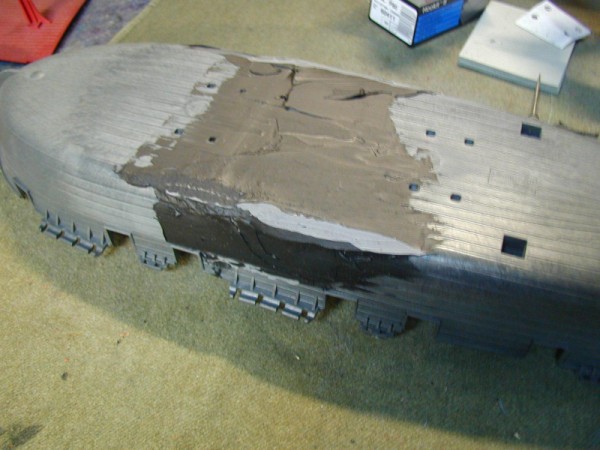
Here I put a first coat of polyester on the lowerparts , to model and finish the outside
To fill the whole in the sides ,first maskingtape to avoid that the glue falls down and to give it model, then I let it dry and put more glue on it to fill the last holes so I could grind it in the right form
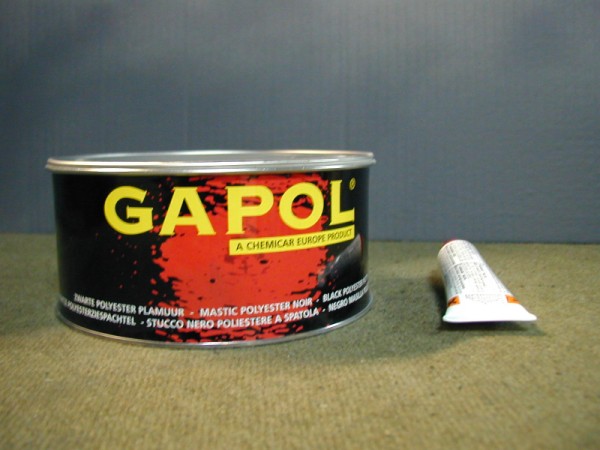
This is the tool and the glue I used , this two component glue is ideal for playmobil , because not all glue will hold on playmobilplastic

A picture from the back of the deck , You see I had to fill a great part with glue , where the stairs were
And again I put the ship together to have a vieuw , how it will become , you can see that the lowerparts have allready been grinded in the form of the ship
This is the polyester I've mentioned , it's a black substance wich you have to mix with an activator and it will be hard in 15 to 30 minutes , then you can manipulate it with al kind of grinding or cutting tools , there are other kinds of polyester ,but experience has learned that this polyester is the best to use on plastics ,it's developped especially for plastic , it won't come of if you prepare your workpiece the right way , wich means you first need to grind and degrease it before putting on the polyester
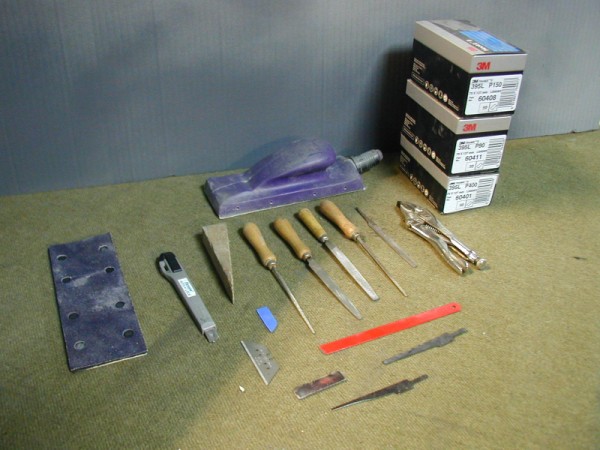
Here's a picture of the tools I used to grind and cut , the black pieces are little ironsaw's wich were used to cut the lines in the lowerparts of the ship , Unfortunally I do not have pictures while grinding
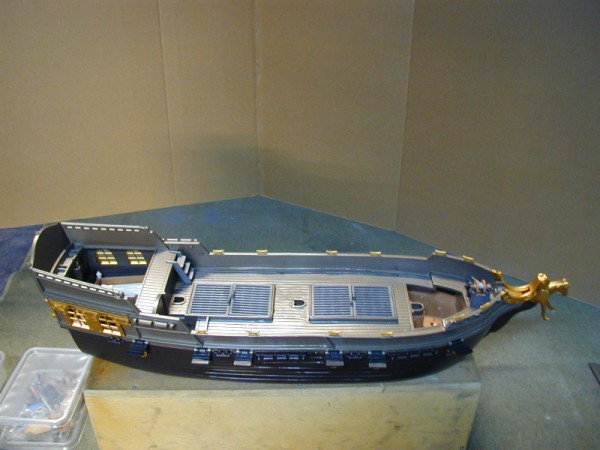
So afther grinding I painted the boat in a primer wich fills the last defaults and with very fine grindingpaper P400 I grinded until all the defaults were gone , Its a dusty work wich needs lots of patience but it's hard to explain
Next thing to do was choosing the colors for the ship and the atributes , I use carpaint because I have lots of samples of different carcolors ,and I choose these
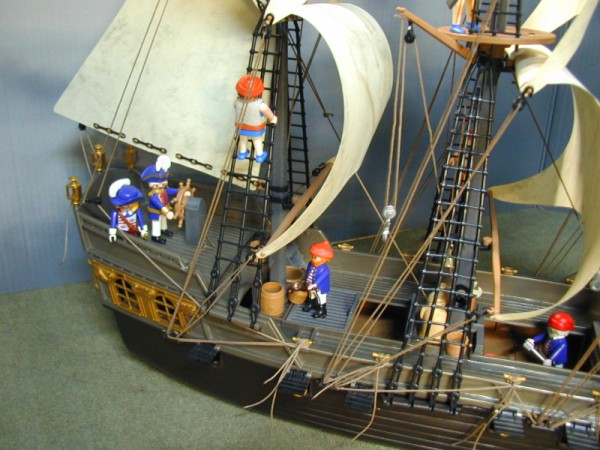
Now we can put on the little parts
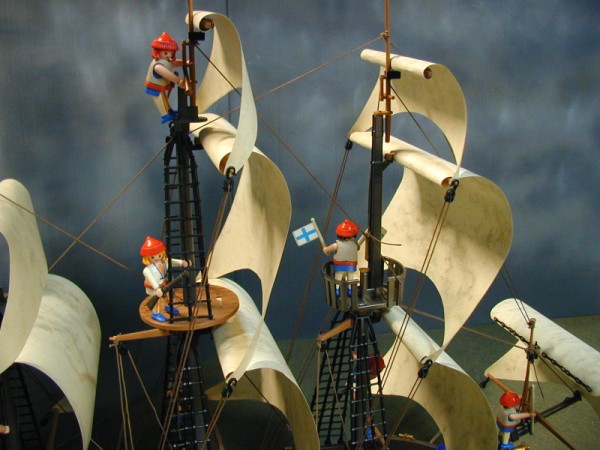
Then the masts
At the back old lanterns I repainted in the same gold as the windows
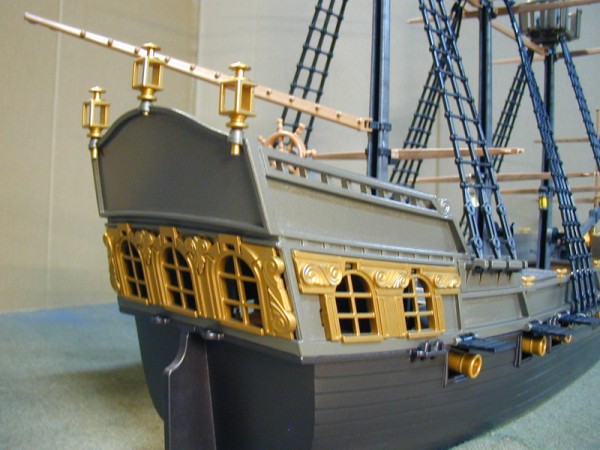
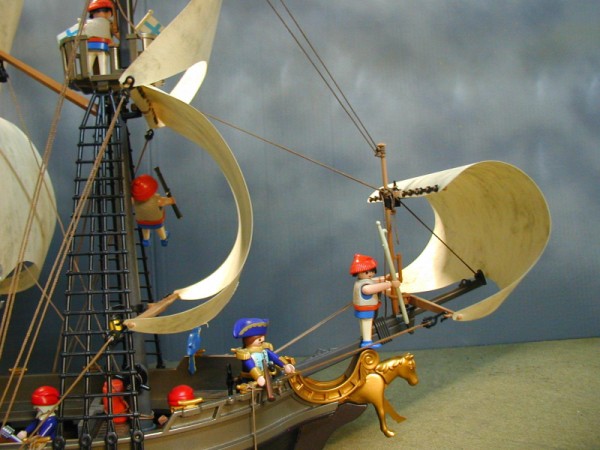
The fog sail from behind

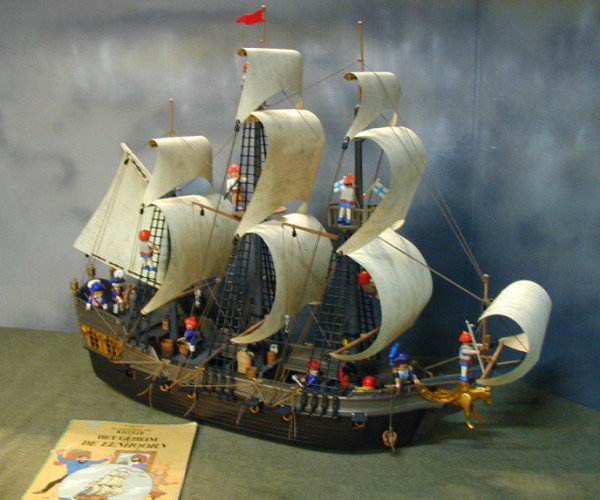
Then a first vieuw with sails , I used heavyweight specialcolored paper for the sails wich you can find in shops who are specialized in school attributes ( ava papierwaren for the belgian vieuwers)
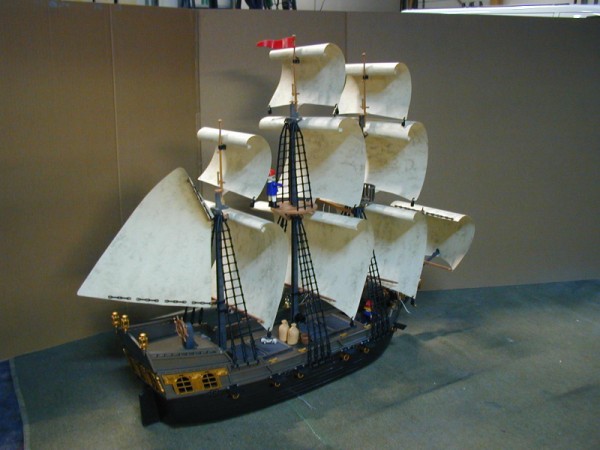
You can see I used maskingtape to hold the sails on place to have an Idea how it will become
I had to take of the sails lots of times and cut them several times before I had the right form for each sail
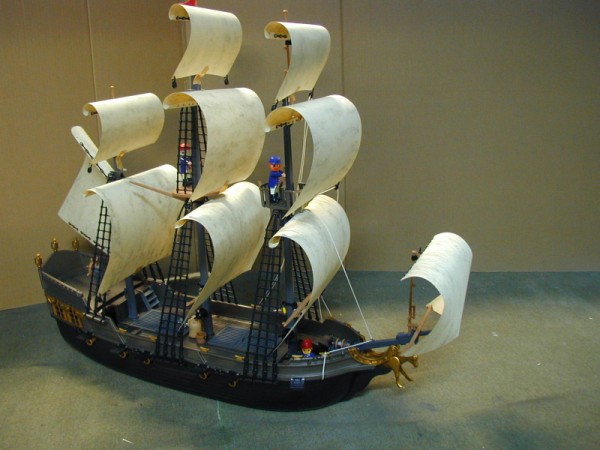
For the roping I had help from a friend who gave me lots of advice how a ship is tied up , that in combination with the picture from the comicstrip gave the result on the following pictures
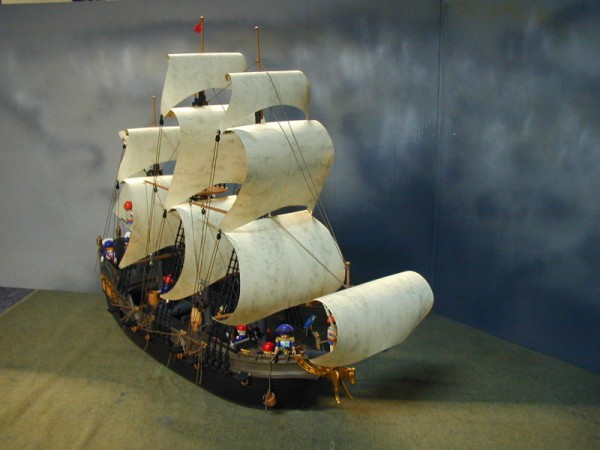
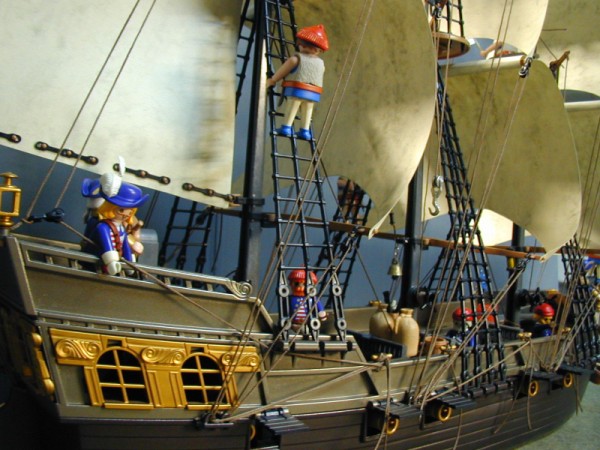
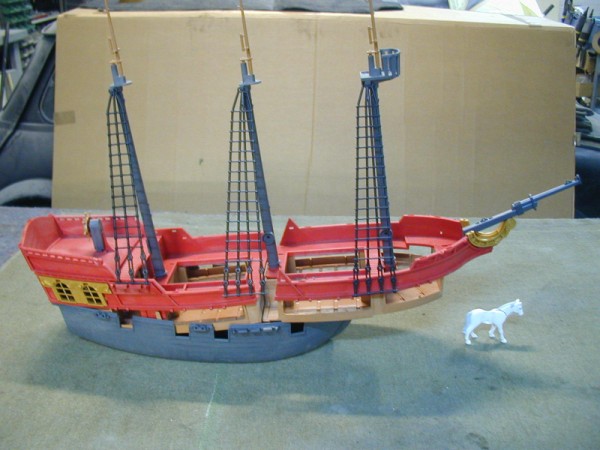
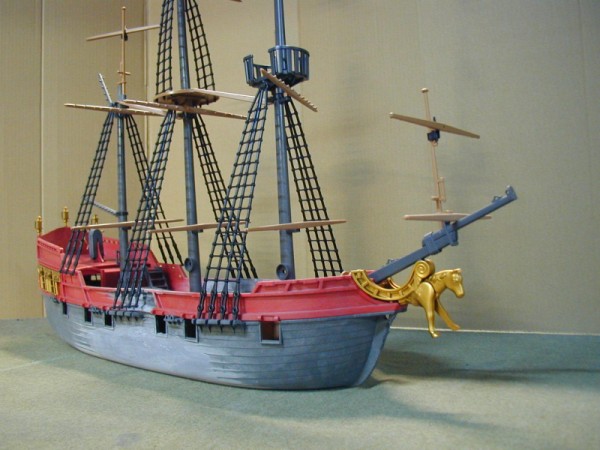
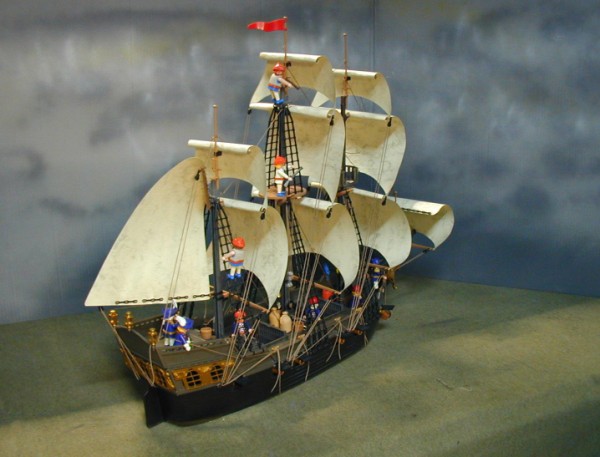
And finally she got ready to present to all of you
I'd like to thank all the people who gave me good advice during the construction of this ship
especially Kris Ruttyn who gave great ideas and comments regarding the roping and the form of the sails
also Guido my boss who let me use the facilities again
I hope you've enjoyed reading this page , I 've enjoyed myself a lot while building this ship
It was quite a challenge
greetings
Macgayver
![]()